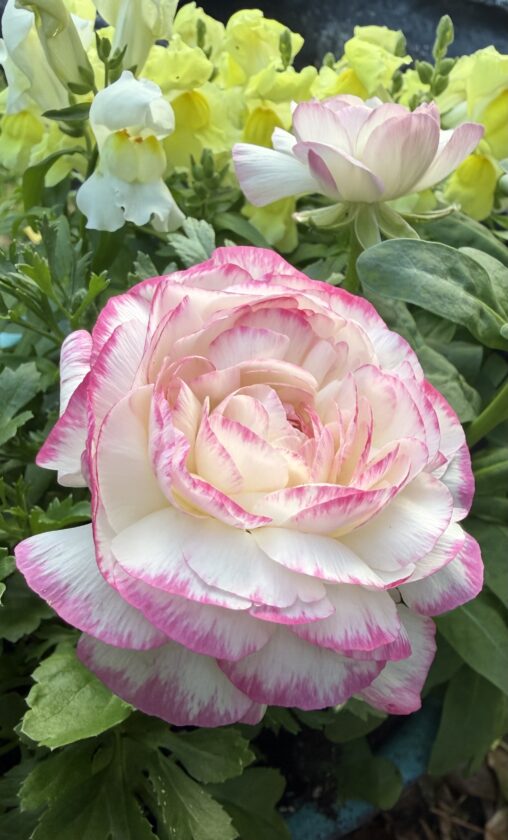
Once ranunculus flowers catch your eye for the first time, you will be smitten with these beauties of spring and will want to fill your garden with them. Also known as the rose of spring, ranunculus have been compared to peonies, roses and camellias. But these members of the buttercup family thrive in cool conditions, and will flaunt their colorful, showy heads as queens reigning over the early spring garden. Once the weather becomes hot, they will stop producing flowers and eventually, like Persephone stolen away too early, will fade away and return to dormancy.
These romantic-looking flowers have grown in their popularity as wedding flowers, with brides adoring their lush layers of crepe paper petals. They are also known for their long vase life, lasting ten days or more. However, they have humble beginnings and are grown from corms, which start out looking like dead, shrivelled spiders. If you order these corms to grow yourself, you will think you have been scammed, since it is hard to imagine something so beautiful can come from such a homely state. Your first step in growing ranunculus from corms is to “wake them up” by soaking them in room-temperature water for about three to four hours. This will bring them back to life, and they will plump up to almost double in size. Be careful not to soak them longer, because ranunculus corms are prone to rotting. At this point, they will look like little octopuses, and you will swear that you see them swimming in the water. After you have removed your plump corms from the water, you will want to pre-sprout them. This will help them develop roots in a controlled setting, allowing them to bloom earlier. You can use a shallow tray filled with a few inches of growing medium, such as potting soil that has been dampened. The corms can be planted in the tray close together, since they will only live in this container for about two weeks. They should be planted with their little claws down and then covered with another one to two inches of soil. At this point, move the trays to a cool area such as an unheated garage or basement. You are aiming for temperatures between 40 and 50 degrees. While you should not need to fuss over them at this point, make sure that they are neither too wet (which can lead to mold and rot) nor too dry. In about 10 days to two weeks, white roots should form, and they should begin to sprout.
Once they begin to sprout, you will want to break up the party and separate the corms. Plant them in pots a couple of inches deep, but keep any green sprouts or leaves above the soil. You can also plant them directly into the garden at this point, six to nine inches apart. Early spring can play April Fools’ jokes on us, so if there is a threat of frost, you should cover your plants with a frost cloth. Though they are tough flowers, they may succumb to a hard frost. As spring progresses and the last frost is a memory of the past, you will be rewarded with amazing flowers that will dazzle visitors to your garden.
Of course, you can skip all these extra steps and just buy ranunculus from your local garden nursery. However, once you have gotten to know these lovely flowers, you won’t be able to get enough of them. They look amazing when combined with other spring flowers such as sweetly scented stock, pansies and sweet peas. Removing the spent flowers down to the stem will encourage continuous blooms, and as mentioned, the cut flowers have a long vase life.
We would love to hear about your favorite spring flowers. Have you ever tried to grow ranunculus from corms? Send your comments and questions to shorelocalgardener@gmail.com.
Tammy Thornton lives with her husband, children, and crazy pets while enjoying a life of gardening, cooking, and going to the beach.